Tag Archives: server

How to match and correlate Windows SCSI Disk IDs with VMware VMDKs

*Note: This is a repost due to moving my posts from SystemsGame.com to 2ninjas1blog.com”

This post comes from a colleague of mine who couldn’t find a great resource on how to correlate the Windows Disk in Disk Management, with the Virtual Disk presented by VMware.

When all the disks are different sizes it is easy, but sometimes they are the same…how can you be sure you are expanding the right disk?

These instructions/steps should allow you to correlate Windows Disks to VMDK Disks.

  1. RDP  to the Windows server in question and run this powershell script
Get-WmiObject Win32_DiskDrive | select-object DeviceID,{$_.size/1024/1024/1024},scsiport,scsibus,scsitargetid,scsilogicalunit | out-file -FilePath c:\OutputPhysicalDrive.txt

This script should allow you to match the OS disks to the VMDK Disks. The output will be referenced in later steps.

Example output

DeviceID : \\.\PHYSICALDRIVE3
$_.size/1024/1024/1024 : 9.99680757522583
scsiport : 3
scsibus : 0
scsitargetid : 0
scsilogicalunit : 0

DeviceID : \\.\PHYSICALDRIVE6
$_.size/1024/1024/1024 : 49.9993586540222
scsiport : 5
scsibus : 0
scsitargetid : 1
scsilogicalunit : 0

DeviceID : \\.\PHYSICALDRIVE4
$_.size/1024/1024/1024 : 19.9936151504517
scsiport : 4
scsibus : 0
scsitargetid : 0
scsilogicalunit : 0

DeviceID : \\.\PHYSICALDRIVE0
$_.size/1024/1024/1024 : 59.996166229248
scsiport : 2
scsibus : 0
scsitargetid : 0
scsilogicalunit : 0

DeviceID : \\.\PHYSICALDRIVE1
$_.size/1024/1024/1024 : 19.9936151504517
scsiport : 2
scsibus : 0
scsitargetid : 1
scsilogicalunit : 0

DeviceID : \\.\PHYSICALDRIVE2
$_.size/1024/1024/1024 : 19.9936151504517
scsiport : 2
scsibus : 0
scsitargetid : 2
scsilogicalunit : 0

DeviceID : \\.\PHYSICALDRIVE5
$_.size/1024/1024/1024 : 49.9993586540222
scsiport : 5
scsibus : 0
scsitargetid : 0
scsilogicalunit : 0

The second step is to get a list of your VMDK disk information by editing the virtual machine in question. 

The information you will be retrieving is the
Disk Name: “Hard disk 1”
Size: “60 GB”
Bus ID: 0
Disk ID: 0

SCSI (X:Y) Hard Disk under Virtual Device Node. The X:Y values are:

X = Bus ID
Y = Disk ID

Enter the Disk information for all VMDK disks into a table like the one below:

Reference OutputPhysicalDrive.txt and match up any OS disks to VMDK disk that have a unique size.

For the non unique drives you will need to match the Windows disk scsitargetid with the VMDK Disk ID.

The first 2 in the example below are both 50GB Drives.

DeviceID : \\.\PHYSICALDRIVE6
$_.size/1024/1024/1024 : 49.9993586540222
scsiport : 5
scsibus : 0
scsitargetid : 1
scsilogicalunit : 0

DeviceID : \\.\PHYSICALDRIVE5
$_.size/1024/1024/1024 : 49.9993586540222
scsiport : 5
scsibus : 0
scsitargetid : 0
scsilogicalunit : 0

The next 3 are all 20GB drives.

DeviceID : \\.\PHYSICALDRIVE2
$_.size/1024/1024/1024 : 19.9936151504517
scsiport : 2
scsibus : 0
scsitargetid : 2

DeviceID : \\.\PHYSICALDRIVE1
$_.size/1024/1024/1024 : 19.9936151504517
scsiport : 2
scsibus : 0
scsitargetid : 1
scsilogicalunit : 0

DeviceID : \\.\PHYSICALDRIVE4
$_.size/1024/1024/1024 : 19.9936151504517
scsiport : 4
scsibus : 0
scsitargetid : 0
scsilogicalunit : 0

Hope this helps anyone else having the issue. I’ll loop around and update the PowerShell script I ended up using for this soon as well.

Thank you vRad for this great guide!

vRealize IaaS Essentials: Building your Windows Server 2012 Template on vSphere – Part 3 (OS Tuning)

Now that we have a base OS build completed, we need to start configuring the OS to the settings we want.

Step 1: Get VMware Tools Installed

Without VMware tools on the OS, many things are sluggish and just annoying. Most importantly it fixes the annoying mouse cursor tracking issues (this is even more noticable when you’re in a VDI session into a VMware Console).

  • Login to your vSphere Web Client and Locate your VM
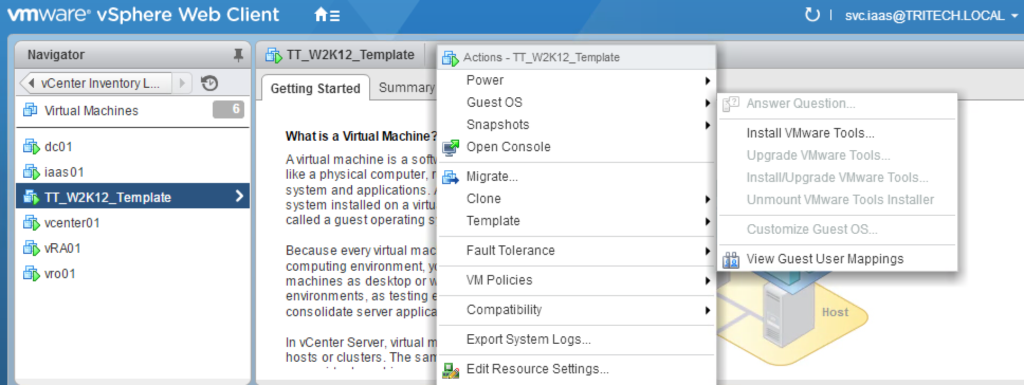
  • Select the VM > Actions > Guest OS > Install VMware Tools...

rwc-template-tools1

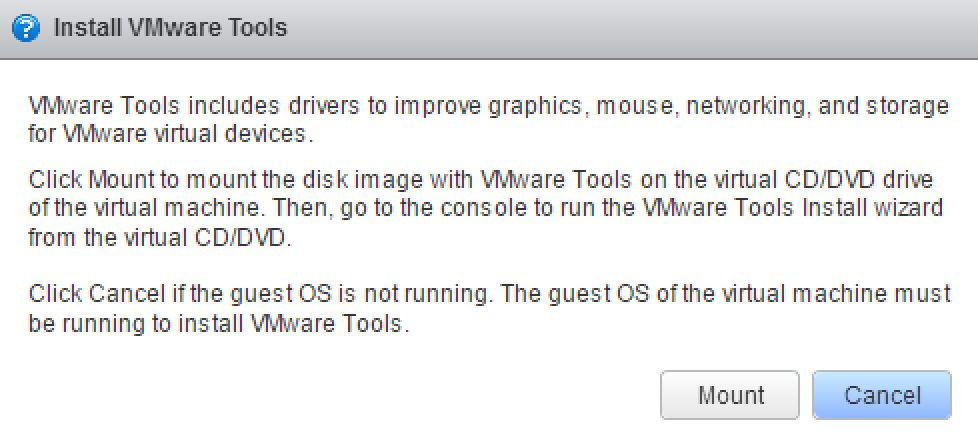
  • You will get a prompt to mount the Tools ISO. Select Mount.

rwc-template-tools2

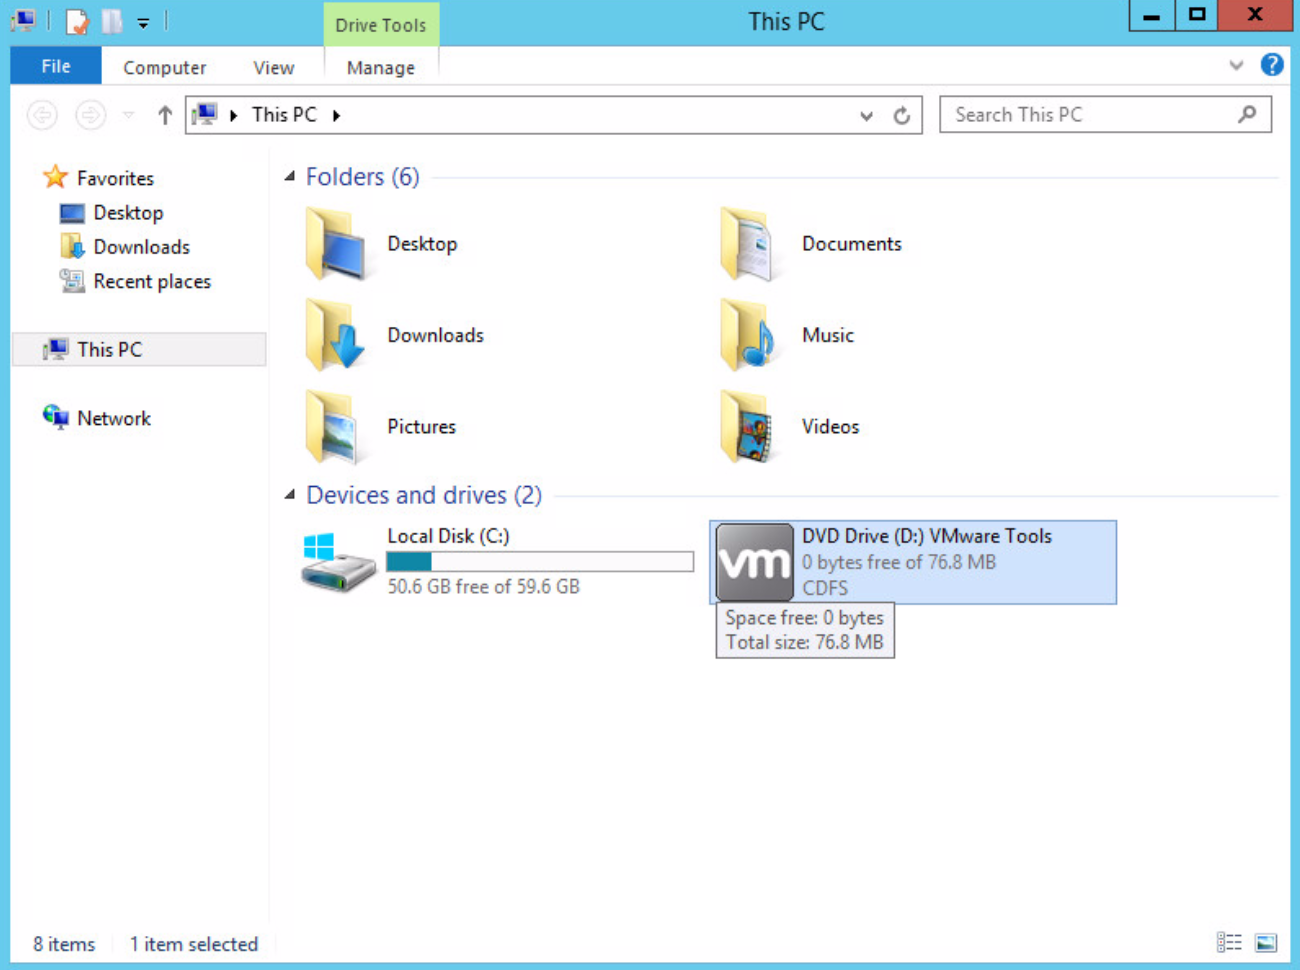
  • Now inside the OS, Open My Computer/This Computer and Tab over to the CD ROM Drive. I found it almost impossible with the mouse using the VRM Console until Tools was installed so I had no choice but to use the keyboard to get it done. A combination of Tab and Space did the trick.

rwc-template-ostools1

  • Once you are there, run Setup and you should be presented with the VMware Tools installation screen.

rwc-template-ostools2

  • Choose Next
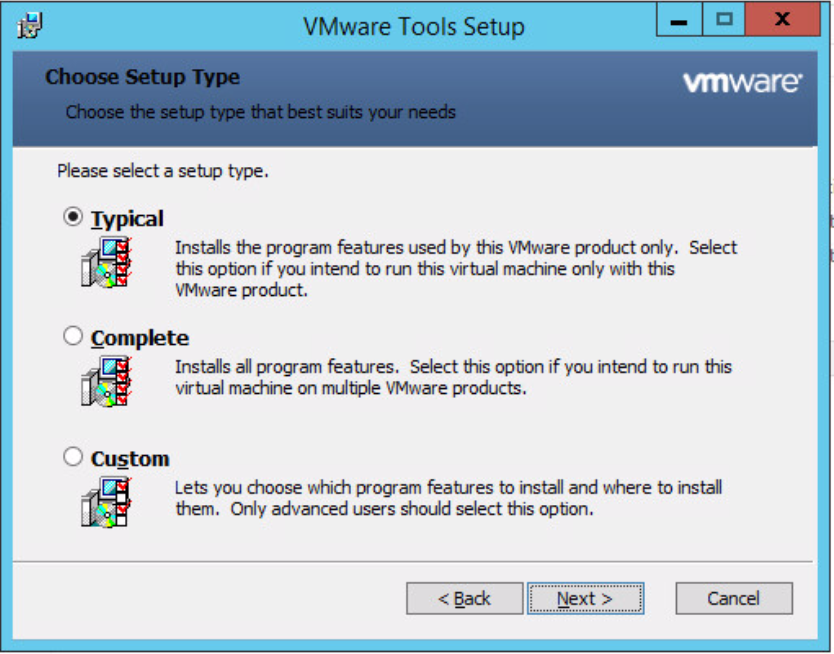
  • Select Typical for your installation type

rwc-template-ostools3


  • Once installation is complete, reboot the OS

Step 2: Fine tune your OS

First of all a big thanks to some of my twitter friends who gave some good suggestions on tweaks here. There is always going to be a debate as to what gets done in the template vs GPO/Configuration Management. I’d say the settings I set below are just the core ones necessary to facilitate deployment of an OS with ease. AD and configuration management should definitely come in after the fact and take care setting other OS settings to their necessary values.

  1. Patch the OS to the latest (It’s worth automating this in the future)
  2. Set Date/Time
  3. Set the OS Hostname to VM Template Name – this helps to know if sysprep worked etc.
  4. Disable the Windows Firewall
  5. Disable UAC
    1. http://social.technet.microsoft.com/wiki/contents/articles/13953.windows-server-2012-deactivating-uac.aspx
  6. Create a Local User account for use by vRealize (e.g. svc_vrealize). You can make sure this account gets disabled automatically as part of your builds or via Puppet, GPO to comply with security requirements. It helps however to be able to easily get into a system using vRO Guest File Operations via a local service account early on.

Also here is a useful link provided by Sean Massey who does a lot of tuning on the Desktop side: https://labs.vmware.com/flings/vmware-os-optimization-tool

Finally, remember to disconnect your CD ISO.

After turning your VM back into a template, we now have a template ready to deploy! Now we can get onto the fun stuff.

Server Name Generator – Part 1

Generate Partial Name Workflow

Summary/Use Cases:

So you finally agreed on a naming standard, congratulations!  This one uses a datacenter location  + network tier + OS + environment level (prod, test, dmz) + application type.  This workflow has several scriptable tasks within it to go with the naming standard we have chosen for servers.  An example server name with this workflow would be AKLP1L1APP (Auckland datacenter on the production VLAN running on a Linux OS for a generic application) with the sequential number appended at the end.  This workflow outputs a partial name to the Server Name Generator Workflow(coming in Part 2) depending on the drop-down choices a user can pick.  An action, is also used, that is dependent on Location in the Presentation of the workflow.   Only location Auckland will have DMZ as an option.

General Attributes:

  • datacenterSN: Type = String
  • networkSN: Type = String
  • envNUM: Type = Number
  • appSN: Type = String
  • osSN: Type = String


Inputs:

  • appType: Type = String
  • location: Type = String
  • network: Type = String
  • envLevel: Type = String
  • OS: Type = String

Outputs:

  • partialName: Type = String

The Workflow:

In the workflow, be sure to use notes to  describe what is being done in each task.

workflowNotes

The Code:

Each scriptable task uses a switch statement with cases defined.

The Network task looks like:

switch(network)
{
//--TriTech Production environment---//
 case "Production":
 {
 networkSN = "P1"
 }
 
break;
//--TriTech DMZ environment---//
 case "DMZ":
 {
 networkSN = "Z1"
 }

break;
//--TriTech Test environment---//
 case "Test":
 {
 networkSN = "T1"
 }
 
break;

}

System.log("The network shortname is " + networkSN);

The code is the same format for Location,Operating System, Environment and Application.


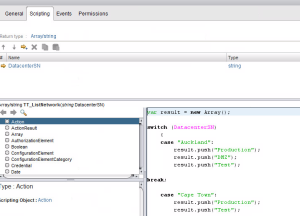
Instead of adding a list of predefined answers, you can create an Action with a Return type: Array/String
createAction

action


Code for the action

var result = new Array();
switch (DatacenterSN) 
       {
      case "Auckland":
              result.push("Production");
              result.push("DMZ");
              result.push("Test");
break;

       case "Cape Town":
              result.push("Production");
              result.push("Test");


       case "London":
              result.push("Production");
              result.push("Test");

default:
        result.push("Unknown Error. Contact automation team");
        }
return result;


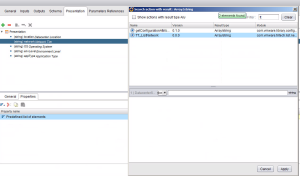
Now attach the action to the presentation of Network Tier by going to the Presentation tab on the workflow.
Presentation allows you options for your inputs, you can set a drop down list by using Predefined answers (probably the most common choice) or in this case we are choosing Predefined list of elements.

presentationview

Select Network Tier
addToPreso

Hit the fun purple button to make an action call
funpurple

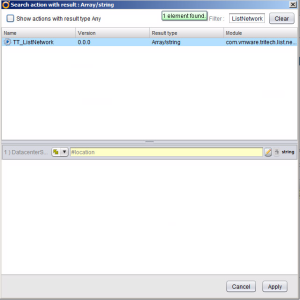
Search in the filter box for your Action and tie it to Datacenter location
location


Now you should see the Get Action code for Network Tier
preso2


The end result.  Only DMZ in the Network Tier will Display for the Datacenter Location, Auckland.  This can be useful in other cases such as specific VLANs assigned to specific locations as well.

dmzAuckland

At the end, we put it all together with the Partial VM Name scriptable task:

partialName = datacenterSN + networkSN + osSN + envNum + appSN
 System.log(partialName);


Download the Generate Partial Name workflow here
We will use this later to create a full server name in the next post of the Server Name Generation series.