

Now that we’ve set our approach for template creation and management, it’s time to create our on-premises vSphere template for Windows Server 2012. The example below is based on VMware vSphere as the hypervisor of choice.
Things you will need
- Microsoft Windows Server 2012 ISO (Download from Microsoft)
- License Key
- vCenter Access
Step 1: Create your ISO
It really helps to first upload your ISO to one of your datastores. Many people prefer an NFS store attached to vSphere for this purpose as it it allows more flexibility when you want to connect that ISO to multiple other hosts where your storage array may not be mapped. In our lab examples, we are using a Tintri-T880 VMstore to keep our templates.
Create a Folder and Upload Windows ISO
- Login to vCenter
- Browse to your Datastore
- Create a New Folder (Something like ISOs or Windows ISOs so you can find it easily)
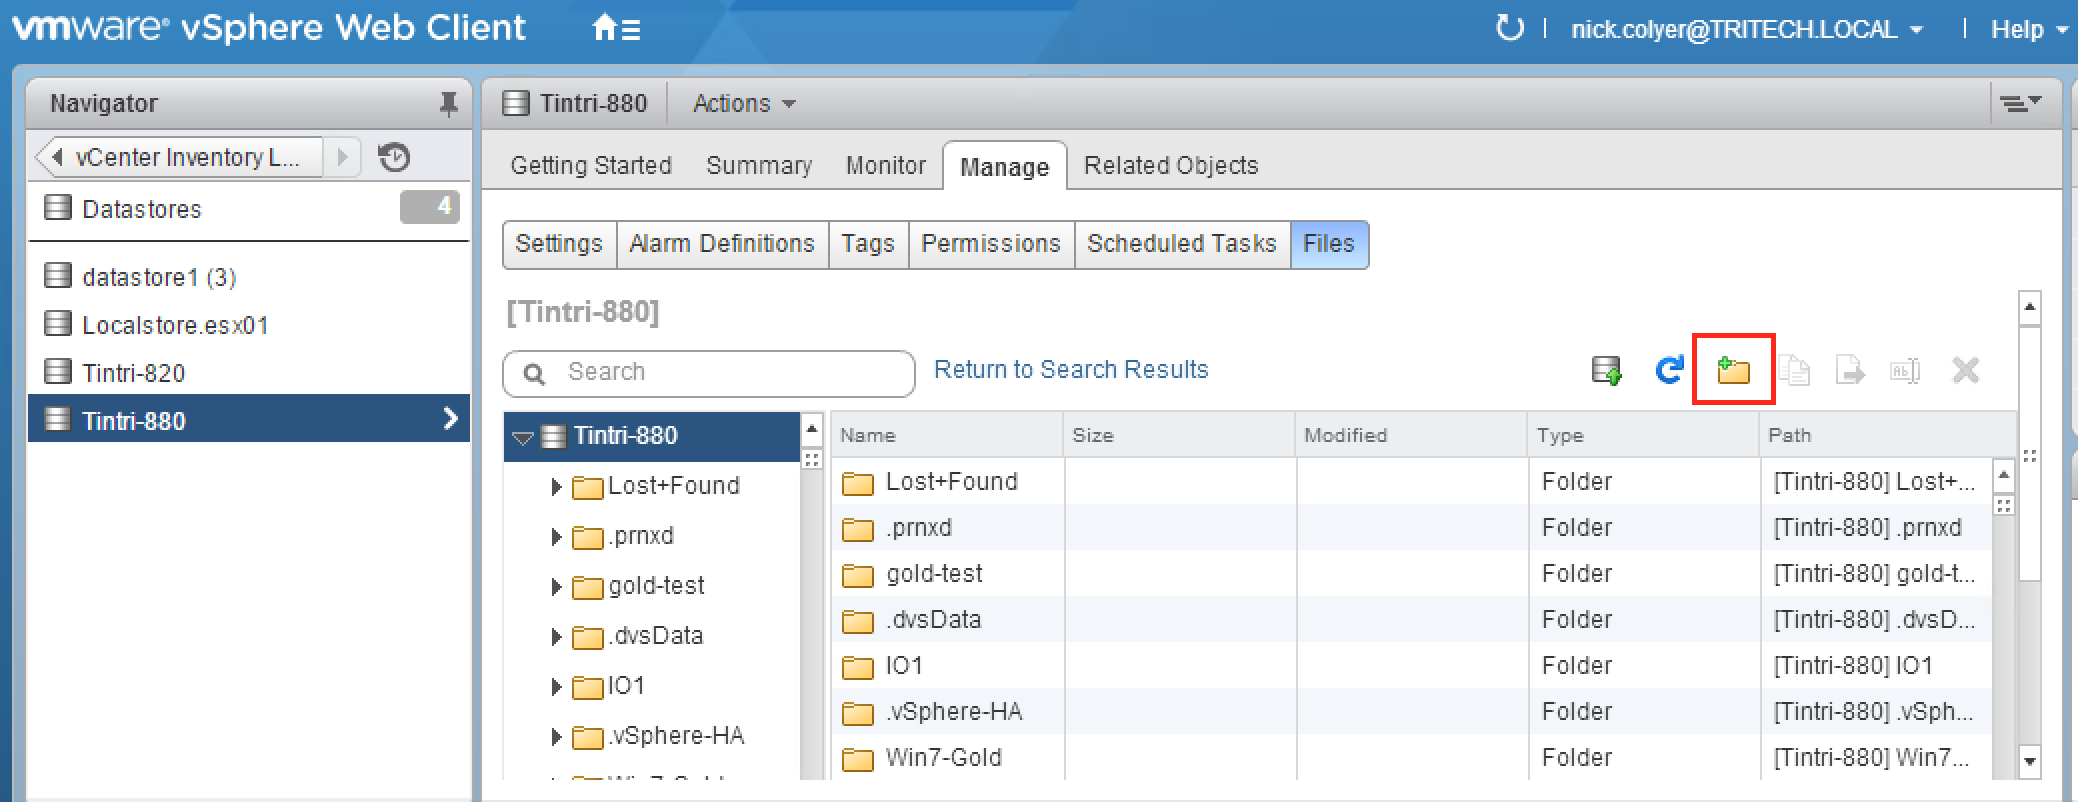
- Browse to your new folder
- Select Upload File to Datastore
- Browse for your ISO and let it upload. This will take a short while depending on your connection to vSphere
Step 2: Create your VM Shell
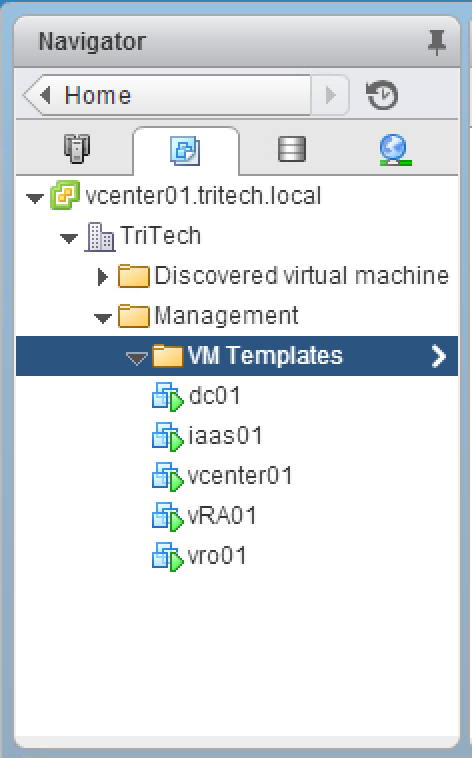
- Switch back to VMs & Templates View
- Create a new folder to store your templates in
- With your new folder selected, select Create a New Virtual Machine from the actions menu
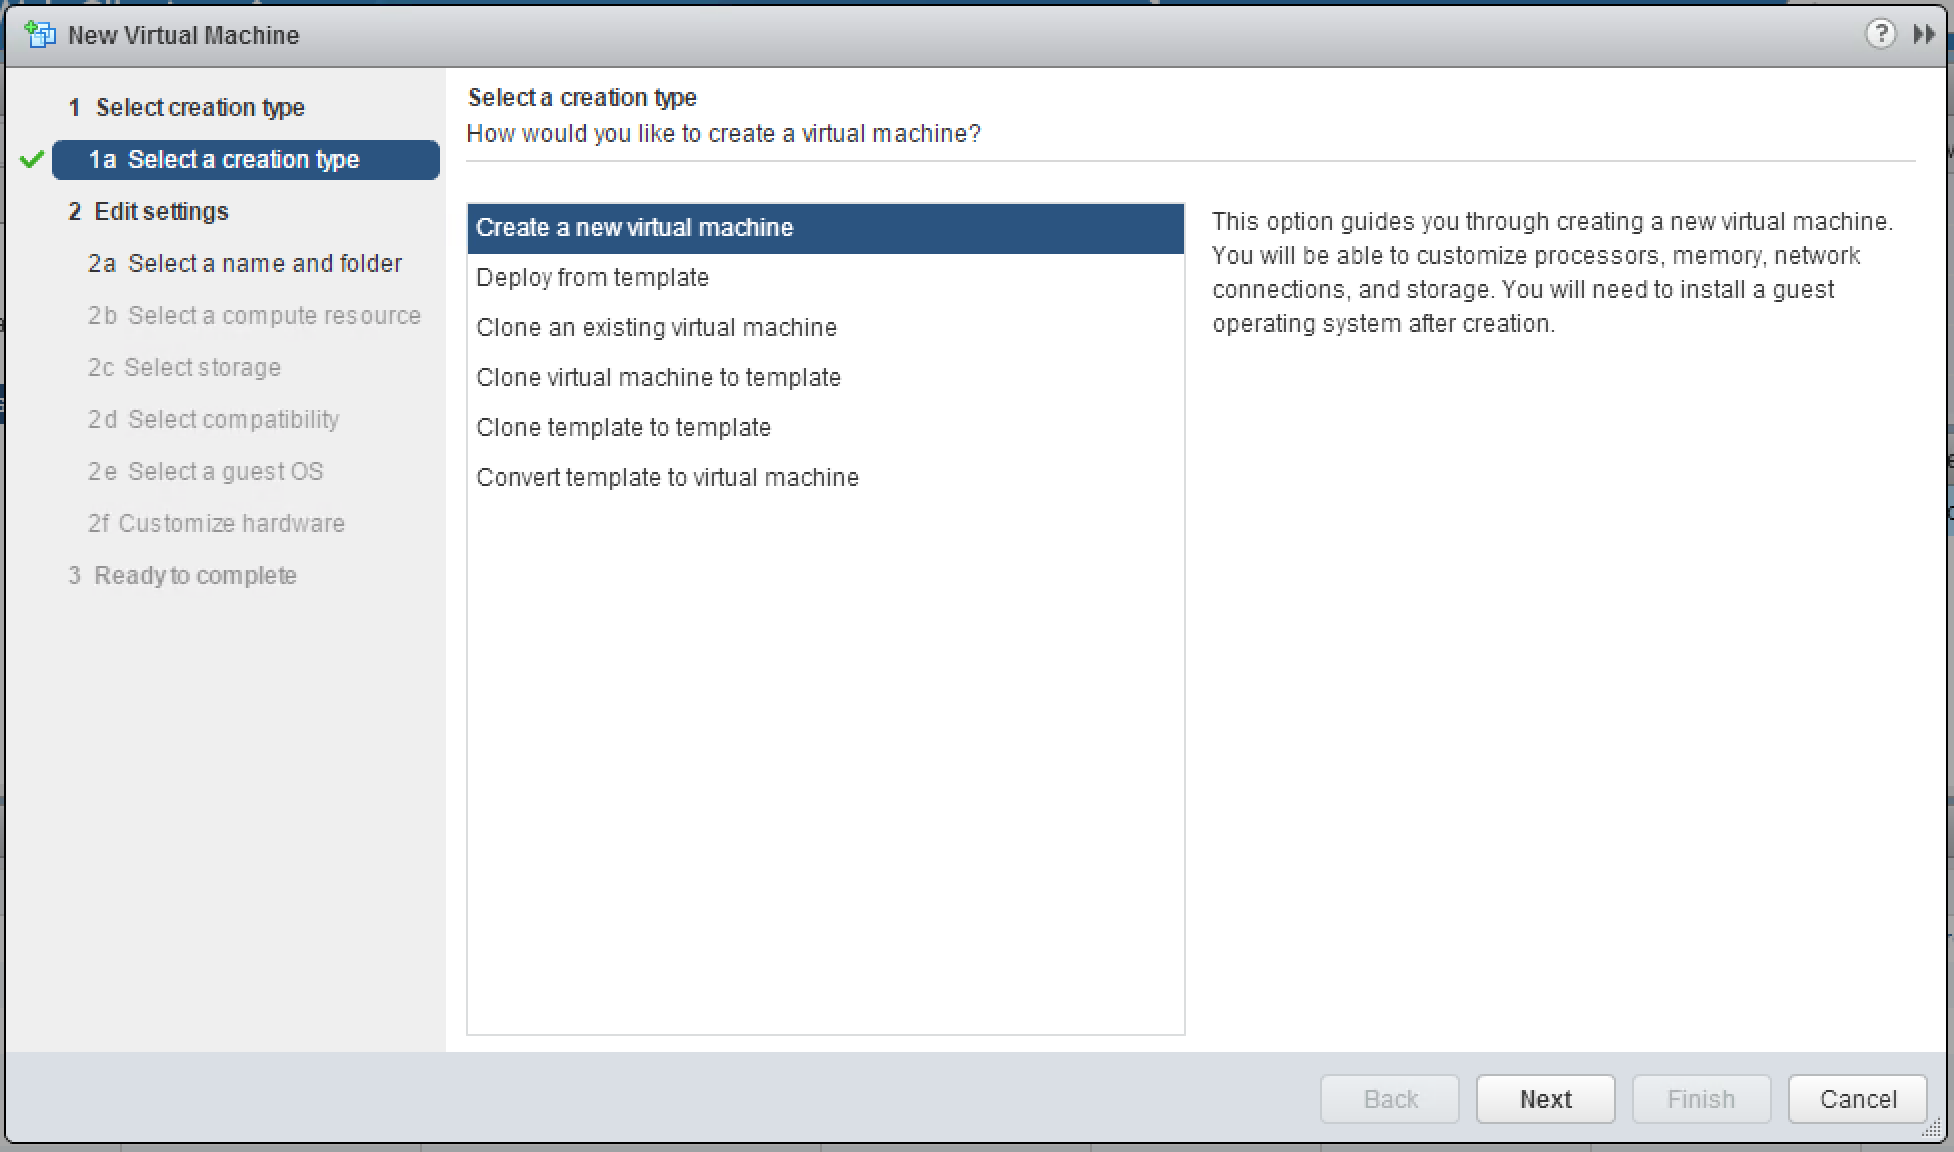
- Select Create a new virtual machine and click next
- Type in a name for your template. In our example we use “TT_W2K12_Template”. Simple and easy to find. Select the VM Templates folder you created previously and click next.
- Select your vSphere Cluster and click next
- Select your Datastore and click next
- Choose your compatibility level. Our clusters are all at 5.5 or above so we have no issues selecting the default of ESXi 5.5 and later.
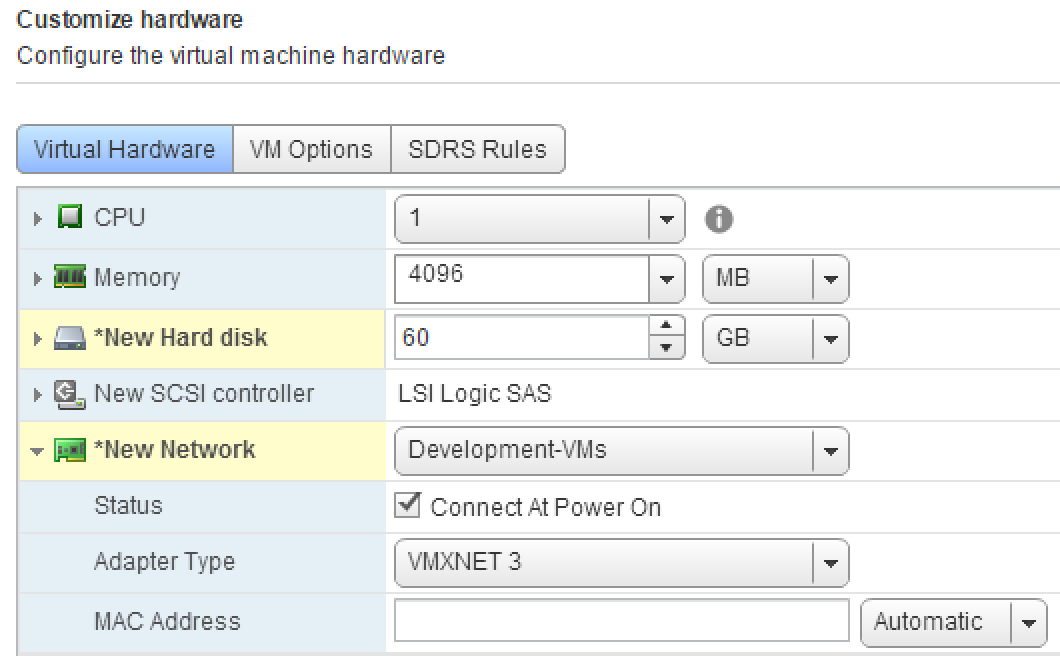
- Customize your VM Hardware
- Choose your CPU, Memory, and Disk configuration
- 1 CPU
- 4096 MB Memory
- 60GB Disk (Up from the default of 40GB. Many could argue to keep it at 40, but with patches and other functions in Windows Management I’ve found 60 to be a safer amount. Plus, since I’m thin provisioned on the storage, it adds little additional cost to me)
- Change the network adapter to VMXNET3 (The days of needing to use the E1000 are over and 2012 supports the VMXNET3 fine without needing to install VMware tools first)
- Choose your CPU, Memory, and Disk configuration
- Attach the ISO we created earlier to the CD-ROM

- Select the VM Options Tab and change the boot options so that the VM boots to the BIOS first.
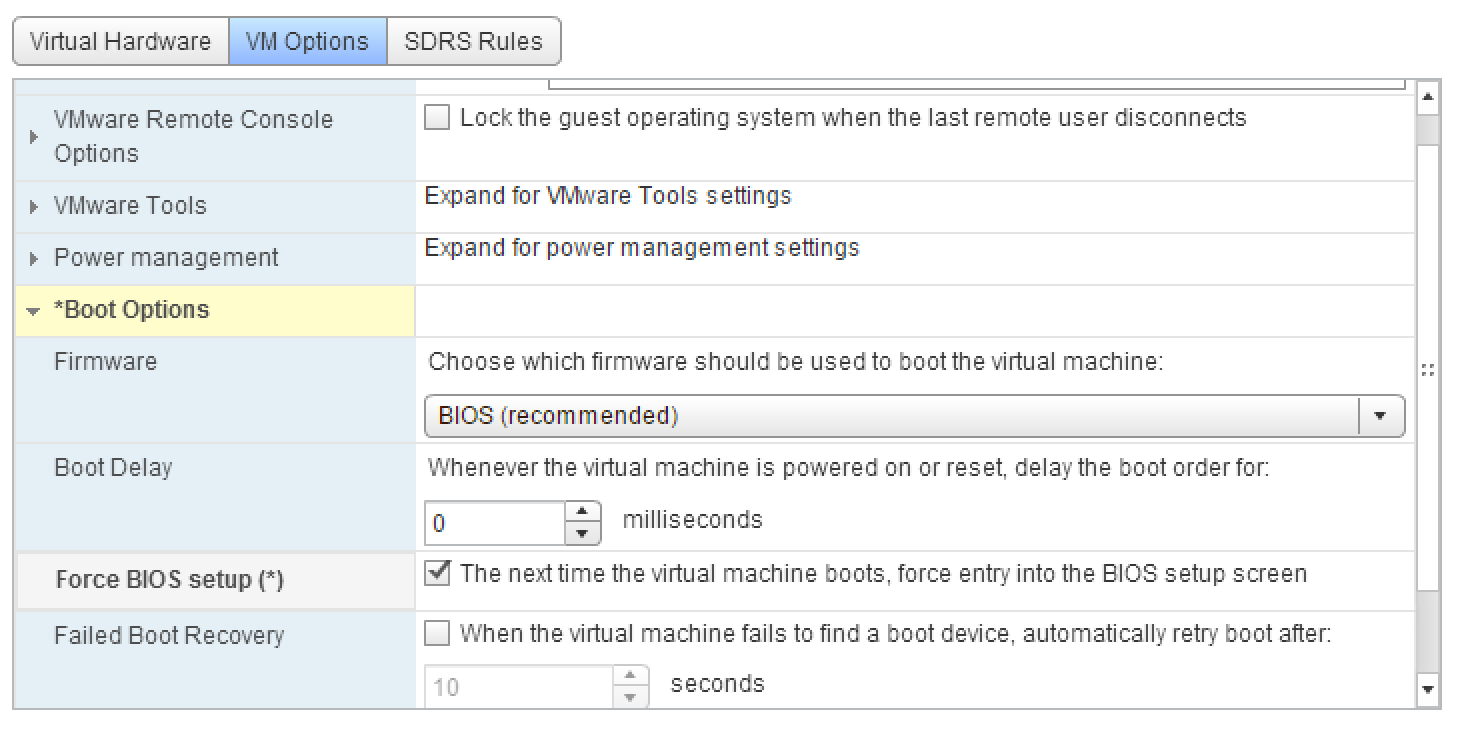
- Power On the VM and it should be automatically in the BIOS
- Go to Advanced > I/O Device Configuration and disable the Floppy Drive, Serial Ports, and Parallel Port
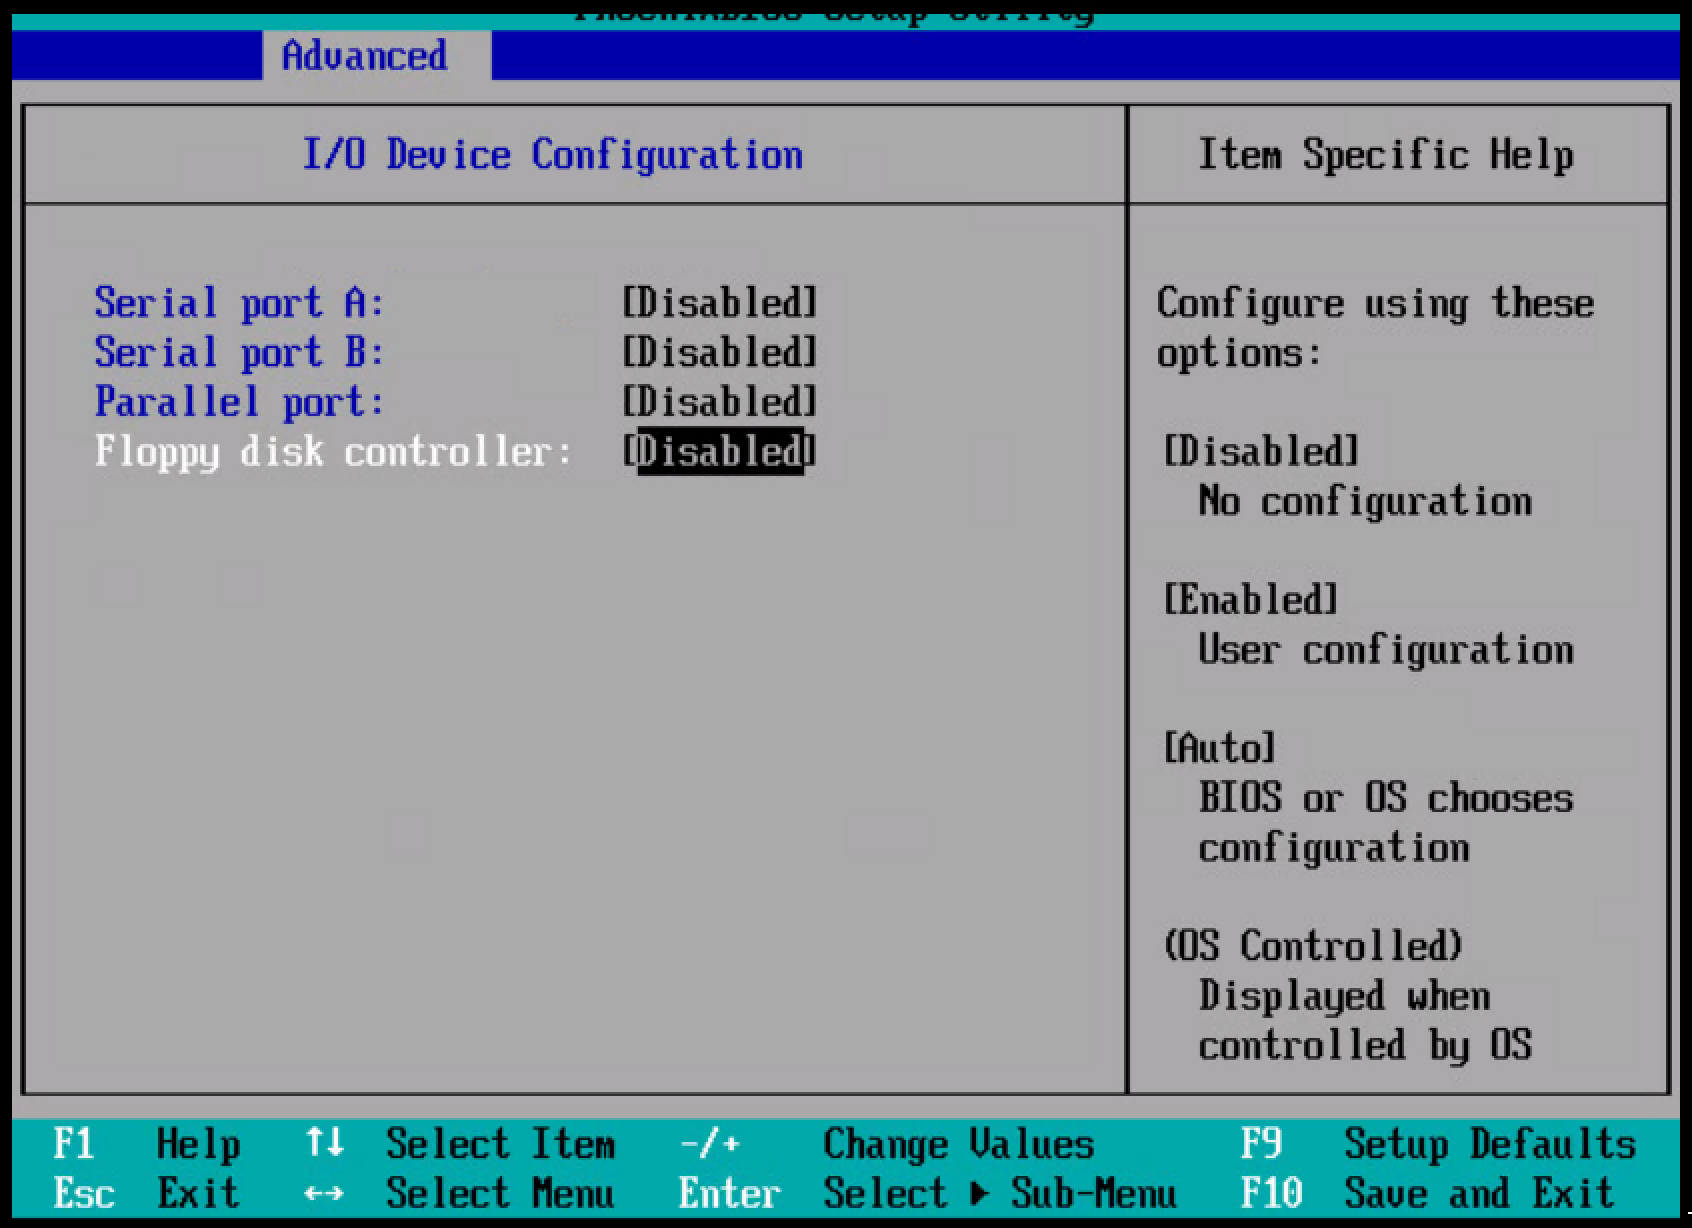
- Press F10 to Save and Exit
- Edit Settings on your VM and connect the CD Rom Drive.
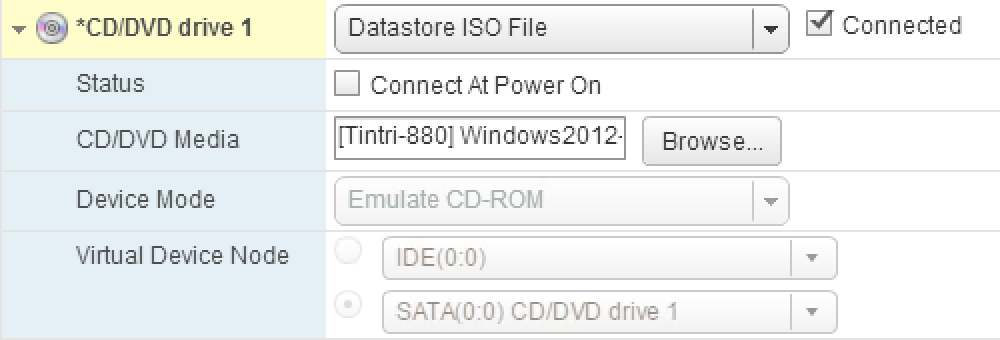
- Restart the VM to begin installing the OS
This concludes the template prep, in part 2 we will continue installing the OS.