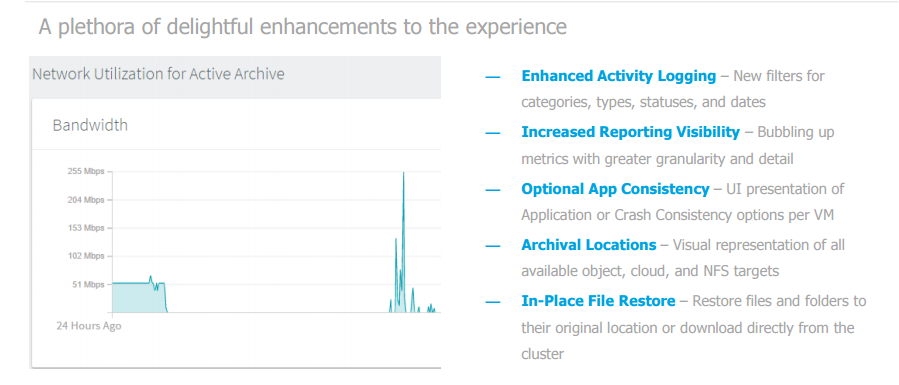
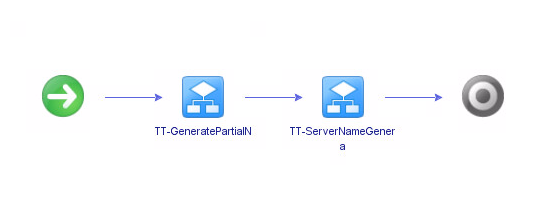
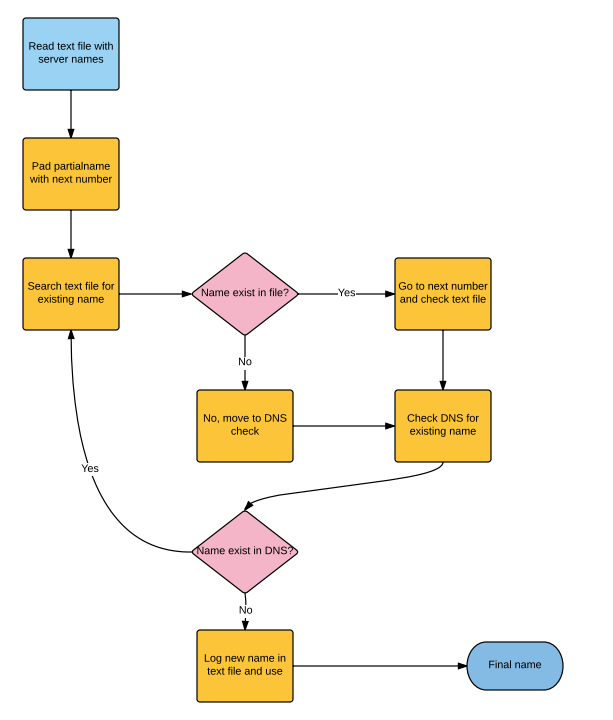
Generate Partial Name Workflow
Summary/Use Cases:
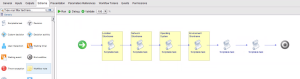
So you finally agreed on a naming standard, congratulations! This one uses a datacenter location + network tier + OS + environment level (prod, test, dmz) + application type. This workflow has several scriptable tasks within it to go with the naming standard we have chosen for servers. An example server name with this workflow would be AKLP1L1APP (Auckland datacenter on the production VLAN running on a Linux OS for a generic application) with the sequential number appended at the end. This workflow outputs a partial name to the Server Name Generator Workflow(coming in Part 2) depending on the drop-down choices a user can pick. An action, is also used, that is dependent on Location in the Presentation of the workflow. Only location Auckland will have DMZ as an option.
General Attributes:
- datacenterSN: Type = String
- networkSN: Type = String
- envNUM: Type = Number
- appSN: Type = String
- osSN: Type = String
Inputs:
- appType: Type = String
- location: Type = String
- network: Type = String
- envLevel: Type = String
- OS: Type = String
Outputs:
- partialName: Type = String
The Workflow:
In the workflow, be sure to use notes to describe what is being done in each task.
The Code:
Each scriptable task uses a switch statement with cases defined.
The Network task looks like:
switch(network)
{
//--TriTech Production environment---//
 case "Production":
 {
 networkSN = "P1"
 }

break;
//--TriTech DMZ environment---//
 case "DMZ":
 {
 networkSN = "Z1"
 }

break;
//--TriTech Test environment---//
 case "Test":
 {
 networkSN = "T1"
 }

break;

}

System.log("The network shortname is " + networkSN);
The code is the same format for Location,Operating System, Environment and Application.
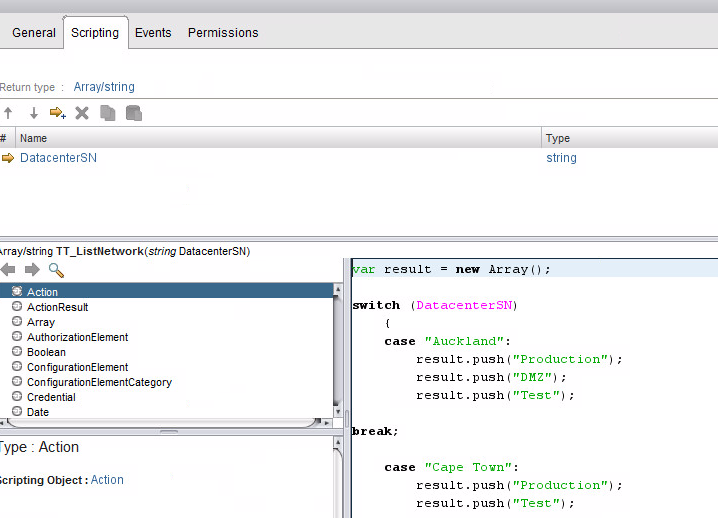
Instead of adding a list of predefined answers, you can create an Action with a Return type: Array/String
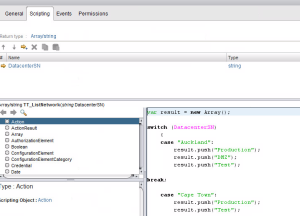
Code for the action
var result = new Array();
switch (DatacenterSN)
       {
      case "Auckland":
              result.push("Production");
              result.push("DMZ");
              result.push("Test");
break;

       case "Cape Town":
              result.push("Production");
              result.push("Test");


       case "London":
              result.push("Production");
              result.push("Test");

default:
        result.push("Unknown Error. Contact automation team");
        }
return result;
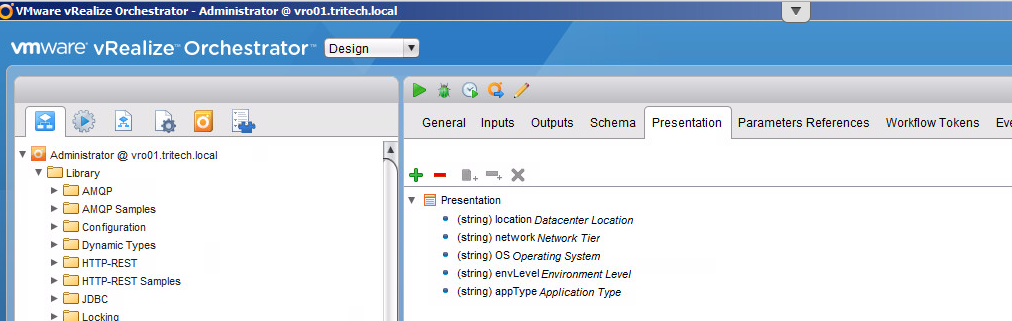
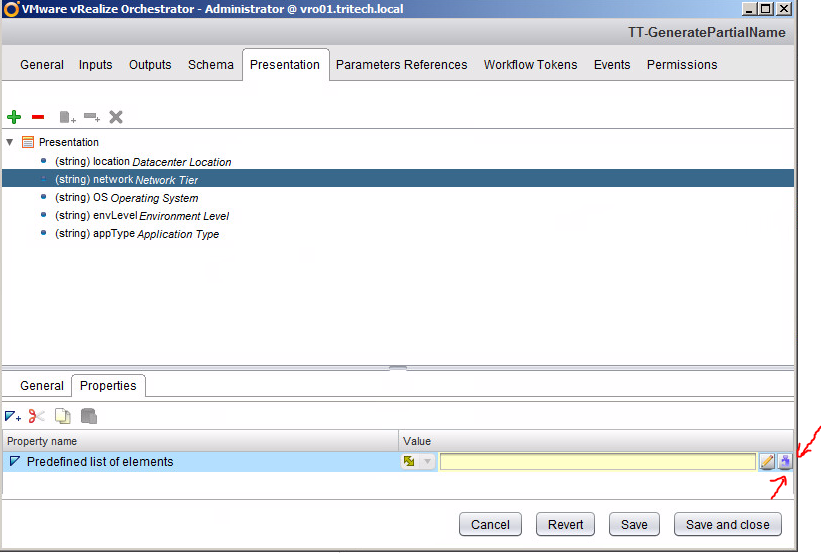
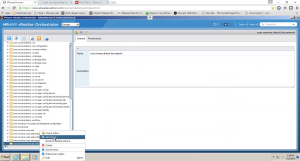
Now attach the action to the presentation of Network Tier by going to the Presentation tab on the workflow.
Presentation allows you options for your inputs, you can set a drop down list by using Predefined answers (probably the most common choice) or in this case we are choosing Predefined list of elements.
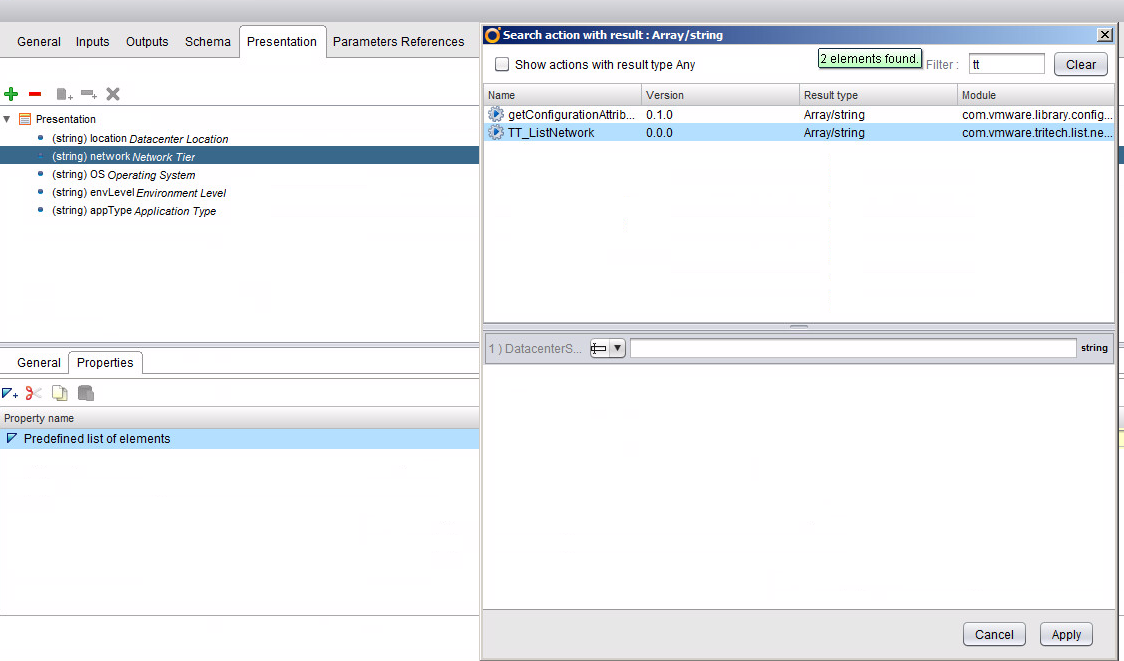
Select Network Tier
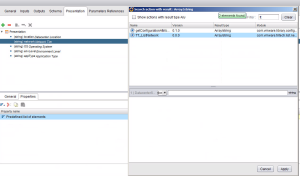
Hit the fun purple button to make an action call

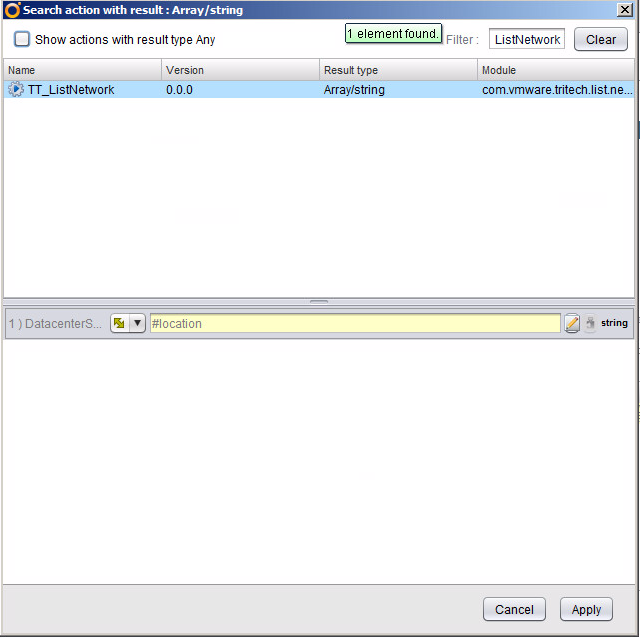
Search in the filter box for your Action and tie it to Datacenter location
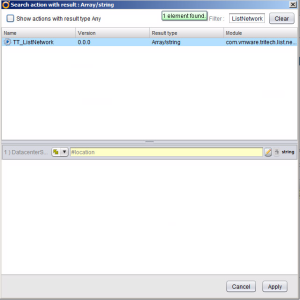
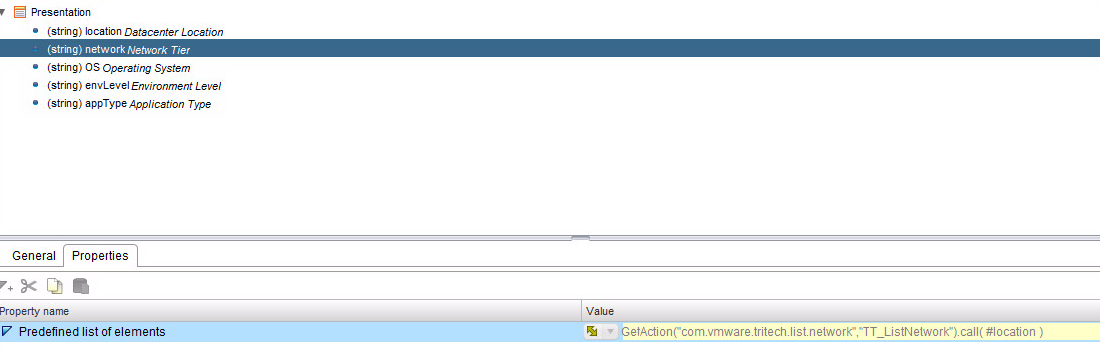
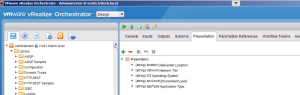
Now you should see the Get Action code for Network Tier

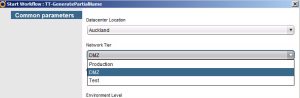
The end result. Only DMZ in the Network Tier will Display for the Datacenter Location, Auckland. This can be useful in other cases such as specific VLANs assigned to specific locations as well.
At the end, we put it all together with the Partial VM Name scriptable task:
partialName = datacenterSN + networkSN + osSN + envNum + appSN
 System.log(partialName);
Download the Generate Partial Name workflow here
We will use this later to create a full server name in the next post of the Server Name Generation series.